
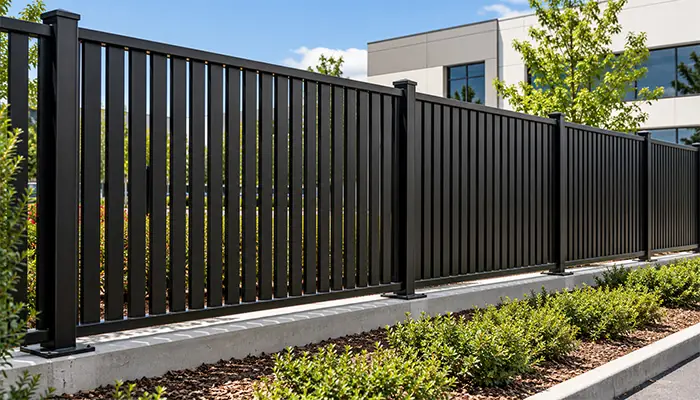
To build a privacy fence, start with a measured layout and a fence system that provides the screening you need. Confirm the boundary and site requirements, choose the panels and posts, calculate the complete parts list, prepare the foundations, and install the fence using the specified connections. Finish by fitting the gate and checking alignment, fixings, and operation.
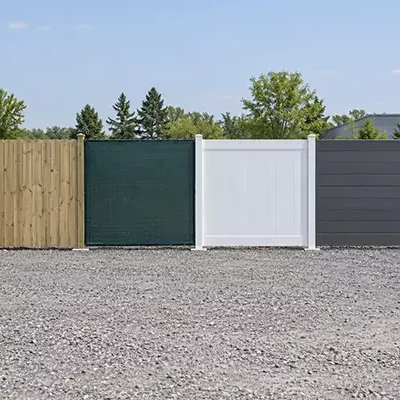
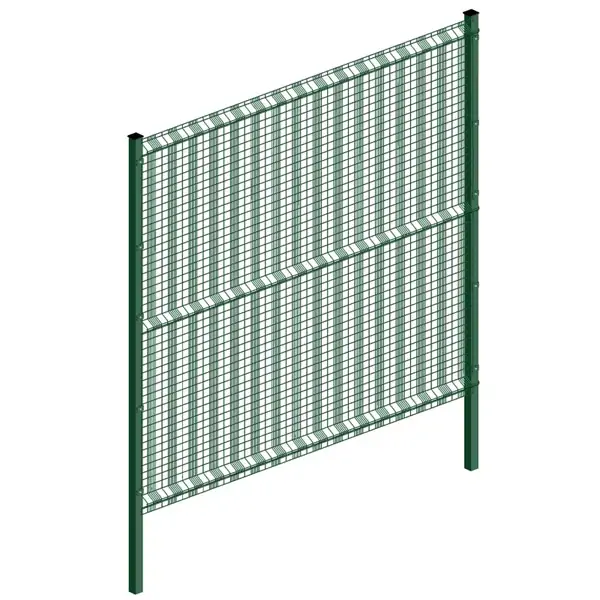
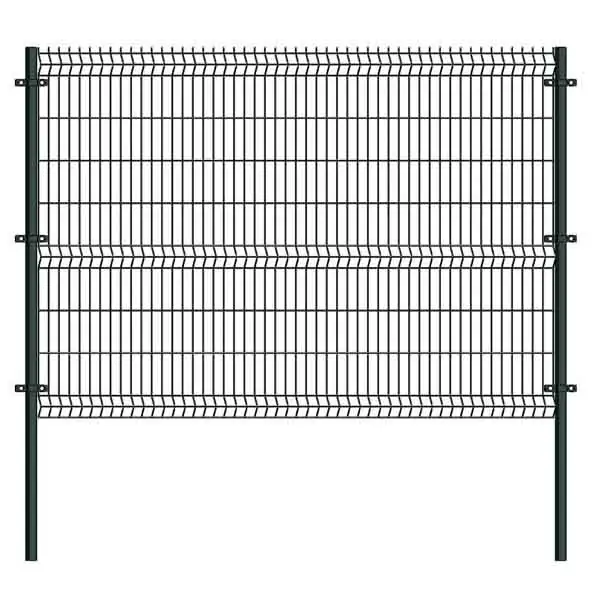
Metal privacy fencing can suit residential boundaries, commercial properties, and areas where views need to be screened. This guide uses blade fencing as its main example: a system of metal blades arranged within a fence design to combine visual screening, boundary protection, and a coordinated appearance.
Whether you are planning a DIY privacy fence or purchasing materials for an installation team, the most useful starting point is a complete system. Panels, posts, connections, gates, and foundations must work together.
What Makes a Fence Suitable for Privacy and Security?
Privacy and security describe different requirements. Security concerns access and physical separation. Privacy concerns what people can see through or over the boundary. A fence may provide both, but a strong open panel does not automatically provide substantial visual screening.
How Blade Configuration Affects Privacy
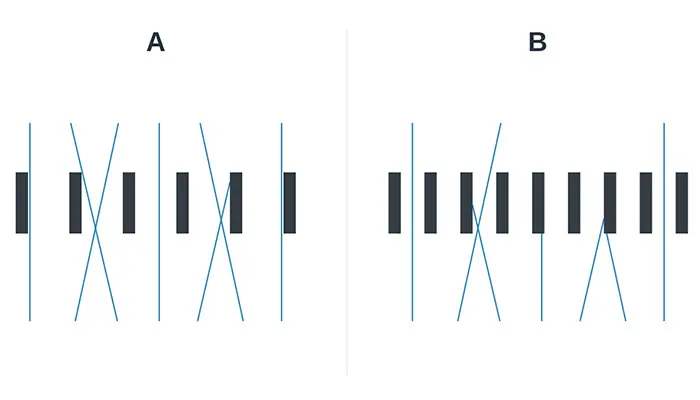
With blade fencing, the relationship between blade width, spacing, orientation, and viewing angle affects the result. A fence that screens a direct view may look more open from the side. Evaluate the design from the places that matter, such as a pavement, neighbouring window, entrance, or seating area.
Describe the required result before choosing a pattern. You may need to screen a patio at eye level, conceal equipment, or reduce views into a commercial yard. These are more useful instructions than simply asking for a “privacy panel.”
Balance Screening, Airflow, and Appearance
Greater coverage changes the way a boundary interacts with wind and light. Assess the whole fence configuration when choosing the screening level. Do not add dense coverings to an existing fence without checking whether its posts, connections, and foundations are suitable for the additional wind loading.
Plan Your Privacy Fence Layout Before Installation
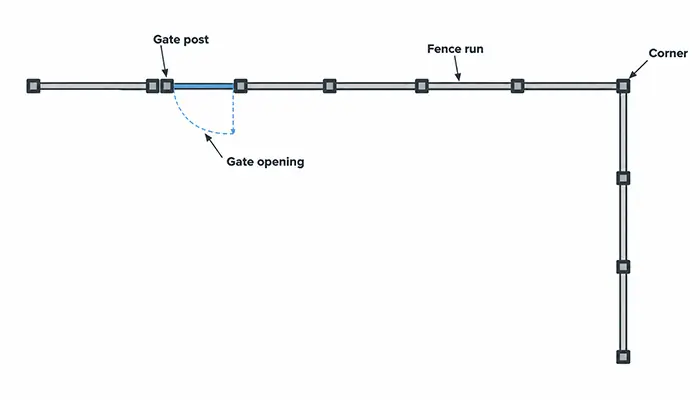
A clear layout helps prevent expensive changes after materials arrive. Begin with a simple drawing showing each fence run, corner, end, gate, and nearby structure.
Check Boundaries and Site Requirements
Confirm the property boundary using appropriate survey information. Check applicable height limits, setbacks, permissions, and any relevant community requirements. Before excavation, arrange underground-service identification through the appropriate local service.
Record anything that could interrupt the fence line: drains, retaining structures, trees, changes in level, or narrow access routes. Include room for installation equipment and panel handling.
Assess Ground Conditions and Gate Locations
Ground conditions and exposure influence the foundation solution. A sloping boundary, soft ground, or an exposed position can require a different arrangement from a sheltered, level site. Provide this information before the post and foundation design is finalised.
Locate gates early. Consider the clear opening, swing direction, ground clearance, and the space required for vehicles or maintenance equipment. Gate posts and their foundations must suit the gate configuration rather than simply duplicate an ordinary line post.
Decide Whether DIY Installation Is Suitable
Separate the work into surveying, foundations, handling, assembly, and adjustment. You may be comfortable assembling a non-welded fence while needing assistance with excavation, anchoring, or heavy gates. Make this decision before hiring tools or scheduling delivery.
Choose the Blade Fence Design and Specifications
Select the fence as a system, then confirm its dimensions and connection details. A photograph can establish the preferred appearance, but drawings and a parts list are needed to define what will be supplied.
Specify the Material and Finish
Record the actual base material and surface treatment. Steel and aluminium options require their own material specifications, connections, and protection details. A colour description alone does not define a coating system or its suitability for the site environment.
YESON’s Blade Fencing range provides a starting point for discussing panel designs, blade dimensions, spacing, colours, and matching gates. Confirm the selected configuration in the quotation and drawings.
Choose Prefabricated Panels or an Assembly System
Prefabricated panels arrive with their main infill already assembled. A non-welded assembly system may require components to be joined on site. These approaches have different packing, handling, and installation needs.
Confirm which work is completed in the factory and which work remains for the installer. A factory-welded panel does not mean that site welding is required. Likewise, a non-welded system still needs the correct components and assembly sequence.
Measure Privacy Fence Dimensions and Post Spacing
Record Each Run Separately
Measure straight sections individually and mark the reference points used. Identify whether a dimension ends at a post centreline, post face, wall, or gate opening. This prevents different people from calculating the same layout in different ways.
| Measurement | What to confirm |
|---|---|
| Fence run | Length and the exact start and end reference points |
| Finished height | Installed height relative to the agreed ground reference |
| Panel size | Actual dimensions and any required connection allowance |
| Post spacing | Centre-to-centre spacing and clear opening between posts |
| Gate opening | Clear passage width, separate from gate-leaf dimensions |
| Ground clearance | Required gap and its variation along slopes |
Do Not Confuse Panel Width with Post Spacing
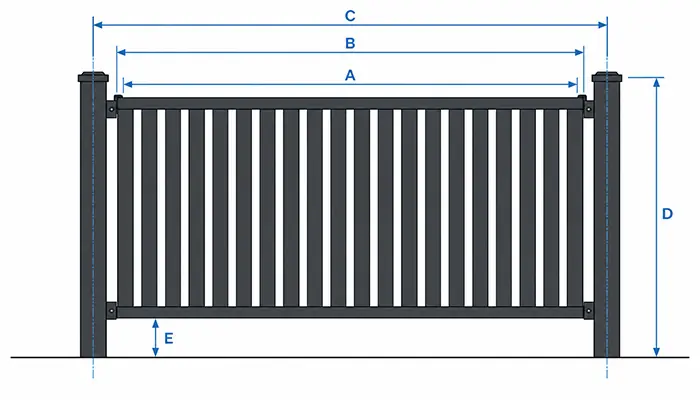
Panel width, the clear opening between posts, and the distance between post centres are different measurements. Brackets, insertion depths, or other connections can affect the relationship. Use the installation dimensions for the selected system.
Plan a 6-Foot Privacy Fence Correctly
Six feet equals 1.8288 metres, so a nominal 1.8-metre panel is not exactly six feet. Confirm whether the specification refers to panel height or completed fence height, including any bottom clearance.
The required post length also depends on its mounting arrangement. Do not order posts solely by matching their length to the desired fence height.
Allow for Slopes
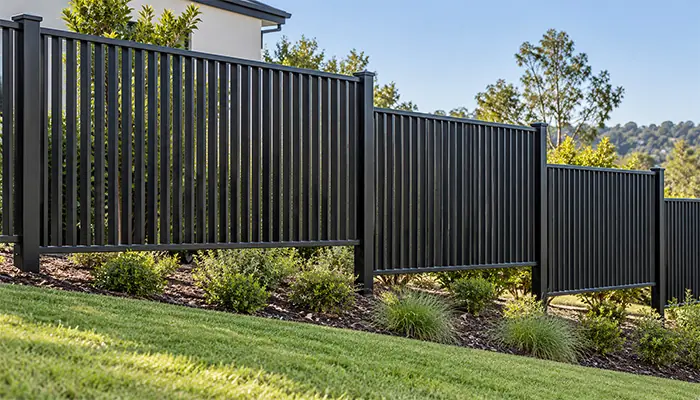
A welded panel should not be assumed to rack or tilt to follow the ground. Depending on the design, a slope may need stepped panels, purpose-made sections, or another approved detail. Check the resulting gaps beneath the fence and around the gate.
Prepare Components, Tools, and Material Quantities
Understand the Parts of a Privacy Fence
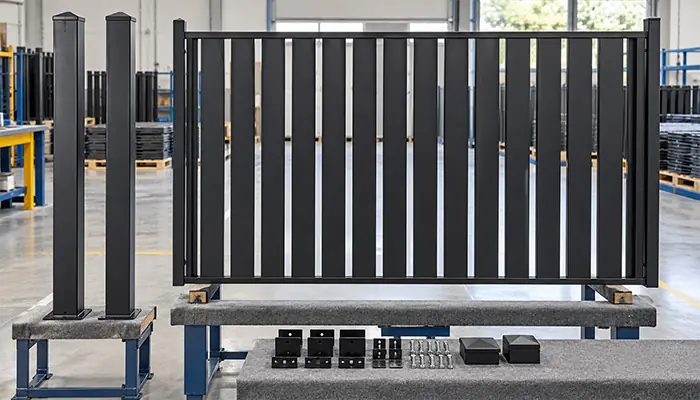
The materials needed to build a privacy fence depend on the selected system. Check the supplied bill of materials rather than ordering from a generic shopping list.
- Fence panels or the specified frame and blade components
- Line, end, corner, and gate posts as required
- Matching connections and fasteners
- Caps, covers, and finishing pieces where applicable
- Gate components and operating hardware
- Foundation or anchoring materials specified for the project
When comparing fence post options, check the section, material thickness, mounting method, and connection compatibility. Different post products serve different fence types; a post should be selected for the intended panel and site conditions.
Calculate Quantities by Fence Run
For illustration, consider a straight run measuring 30 metres between the first and last post centrelines. If its approved installation module were exactly 2 metres, it would contain 15 bays and, with shared intermediate posts, 16 posts. This is a counting example, not a recommended spacing.
Recalculate separately where gates, corners, changes in height, or custom sections occur. Count each shared post once, then identify its required type. Calculate brackets and fasteners from the actual connection schedule.
Prepare Tools and Handling Arrangements
Typical planning and assembly tools include a tape measure, stakes, string line, level, suitable drivers, clamps, and temporary supports. Foundation tools depend on the project method. Use protective equipment appropriate to the work, and arrange enough people or lifting equipment to control the panel weight.
Store components on suitable supports and protect finished surfaces. Do not assume that dragging a panel, drilling an extra hole, or trimming a rail is acceptable for every system.
How to Build a Privacy Fence Step by Step
The following sequence explains the main stages of privacy fence installation. Apply it with the drawings and instructions for the selected model; connection sizes and foundation details are project-specific.
Step 1: Verify the Drawings and Delivered Parts
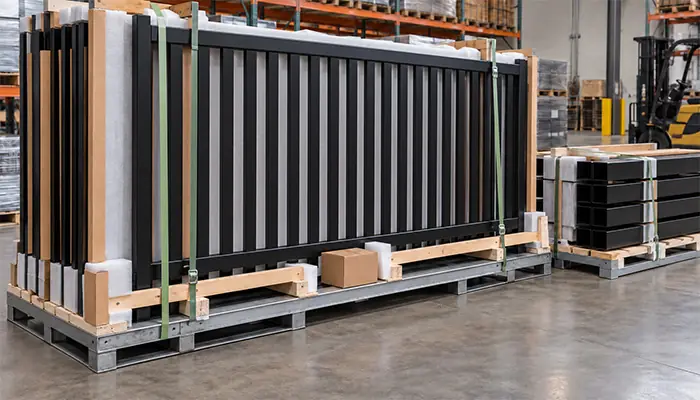
Compare the delivery with the layout and parts list. Separate standard panels from gates, corners, short sections, and any direction-specific parts. Resolve missing or mismatched components before starting the fence line.
Step 2: Mark Post Positions and Gate Openings
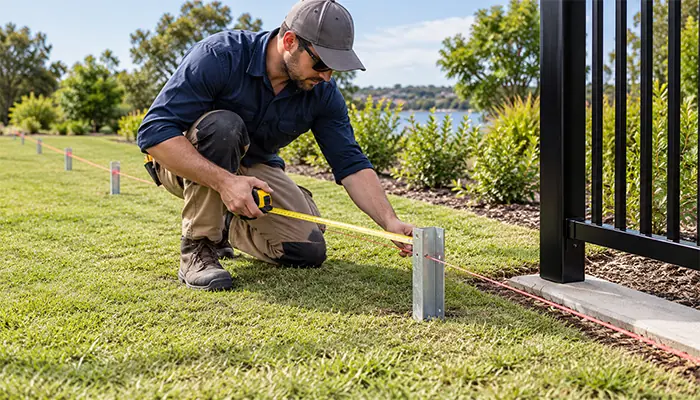
Set out the boundary reference and mark post positions using the specified installation module. Check the first bay against the actual connection dimensions before repeating the spacing along the run.
Recheck corners and gate openings independently. Small errors repeated across several bays can leave an unusable end section.
Step 3: Prepare the Specified Foundations or Mounting Points
Follow the project’s foundation arrangement. Embedded posts and base-plated posts require different details. For surface mounting, confirm that the supporting structure and anchoring design are suitable; paving or an existing slab should not automatically be treated as an adequate foundation.
Post-hole dimensions, concrete requirements, anchor selection, and edge distances must come from the applicable design and product requirements. There is no single hole depth or anchor size suitable for every privacy fence.
Step 4: Position and Align the Posts
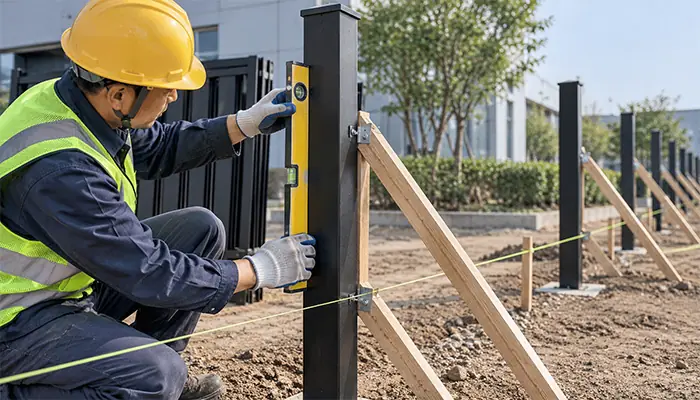
Check post orientation as well as position: connection faces must point in the required directions. Verify the clear opening, centre spacing, vertical alignment, and planned height. Use suitable temporary support to hold the arrangement during the next operations.
Follow the system’s assembly sequence. Some installations coordinate post positioning with panel fitting; others fix posts before adding panels. Do not apply significant panel or gate loads until the foundations or anchors meet their specified loading conditions.
Step 5: Fit the Required Connections
Identify the correct connectors for straight runs, corners, ends, and gates. Follow the specified locations and fixing sequence. Use the required fastener type and tightening requirements without substituting whatever hardware happens to be available.
When sourcing fence hardware and accessories, request a system-specific list. Availability in a general catalogue does not establish compatibility with a particular blade panel.
Step 6: Install the Panels or Assemble the Selected System
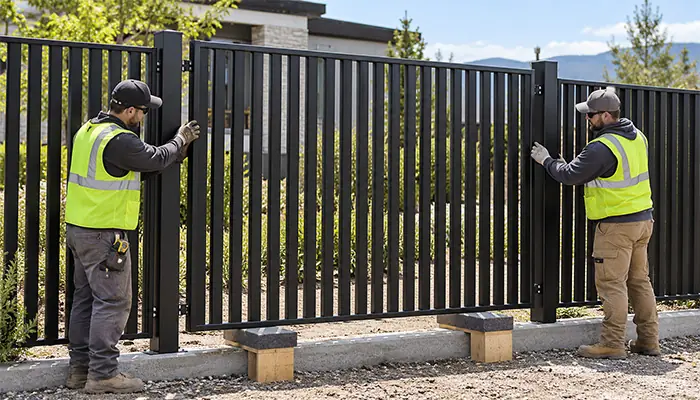
For a prefabricated panel, bring it into position with controlled support, align its connection points, and secure it in the prescribed sequence. Keep it supported until the required connections are complete.
For a non-welded assembly system, identify the frame, blade, and retaining components before assembly. Use a protected, stable working area where required and follow the model-specific order. Check squareness and component orientation as the assembly progresses.
In both cases, check alignment after the first completed bay. Blade spacing and orientation should match the approved configuration; changing them on site can affect appearance, screening, and the intended assembly.
Step 7: Complete Corners, Ends, and Sloped Sections
Use the planned details for transitions. A custom short section may be preferable to modifying a standard panel. Where cutting or drilling is permitted, follow the instructions for the component, connection, and protective finish.
Check stepped sections from both sides. Their appearance and bottom clearance should suit the agreed layout rather than simply follow the easiest position for the installer.
Step 8: Install and Adjust the Gate
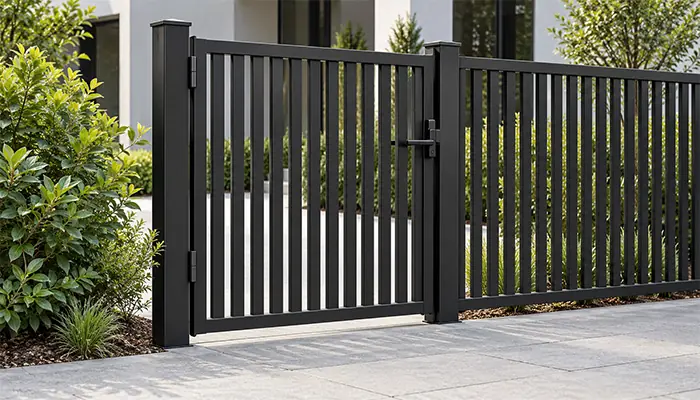
Fit the gate using its own support and hardware requirements. Confirm opening clearance, alignment, stops, and locking operation. Test the full travel without allowing the leaf to strike the ground or adjoining fence.
Pedestrian, double-leaf, and sliding gates require different arrangements. Do not turn an ordinary fence panel into a gate without a suitable gate design.
Step 9: Finish and Inspect the Installation
Fit the applicable caps, covers, and trims, then check all required connections. Examine finished surfaces and deal with damage using the appropriate repair method.
Walk the completed line and inspect post alignment, panel consistency, bottom gaps, and gate operation. Remove packaging, metal debris, and temporary equipment. Retain the drawings, product details, and completion photographs for future maintenance.
How to Install Privacy Fence Panels Between Posts
The connection detail determines how a panel fits. Before lifting, confirm the required clear opening, mounting direction, connection allowance, and the route by which the panel enters its supports. Do not force a panel into an opening that has been measured incorrectly.
Use temporary supports that keep the panel stable at the intended height. Complete the required connections while maintaining alignment, then remove support only when the system permits. Repeat checks as the run progresses rather than correcting accumulated errors at the final bay.
For DIY privacy fence panels assembled from components, distinguish assembly dimensions from finished installation dimensions. Check the complete panel size before committing the adjoining posts or connections. Do not assume that all panels can be narrowed, re-angled, or fitted to a slope.
How to Control Privacy Fence Installation Costs
Building a privacy fence economically starts with an accurate layout and a complete quotation. Compare the cost of the installed system, including posts, fittings, gates, foundations, freight, handling, equipment, and labour.
Use standard modules where they fit the site. Confirm short bays, slopes, and gates before production so they can be priced and packed correctly. A low panel price provides little benefit if essential accessories or custom sections need a separate shipment.
DIY installation may reduce purchased labour, but include tool hire, site preparation, your available time, and the possibility of rework. Reduce avoidable waste and modification rather than arbitrarily increasing post spacing or removing specified fixings.
Common Privacy Fence Installation Mistakes to Avoid
| Mistake | Better approach |
|---|---|
| Choosing height without checking sight lines | Review screening from the important viewing positions. |
| Using panel width as post-centre spacing | Work from the selected system’s installation dimensions. |
| Assuming every panel follows a slope | Confirm stepped, raked, or custom arrangements before ordering. |
| Changing blades or connections on site | Follow the agreed configuration and approved adjustment methods. |
| Ordering panels without a complete parts list | Count posts, connections, end details, and gates separately. |
| Loading foundations too early | Follow the specified loading conditions. |
| Treating a gate as another fence bay | Check its independent support and operating requirements. |
Maintain Your Metal Privacy Fence After Installation
Clean the fence using methods compatible with its finish. Remove dirt, salt, and accumulated pollutants as required by the environment and product instructions. Avoid abrasive cleaning or chemicals that could damage the coating.
Inspect connections, posts, caps, and gate hardware periodically and after severe weather. Investigate movement, loose components, drainage problems, or surface damage early. Replace parts with compatible components and follow the coating system’s repair instructions.
Keep the product specifications and finish details with the maintenance record. They make it easier to identify suitable replacement parts and distinguish normal cleaning from repairs that need specialist attention.
What Should B2B Buyers Specify Before Ordering?
A useful enquiry describes the project and the complete supply scope. For contractors, distributors, and project purchasers, agreeing these details before production helps prevent shortages and unsuitable components.
| Information | Details to provide |
|---|---|
| Application and destination | Country, site use, environmental exposure, and delivery location |
| Layout | Run lengths, corners, ends, slopes, obstacles, and gate positions |
| Dimensions | Finished height, actual panel size, installation module, and clearances |
| Privacy requirement | Areas to screen and relevant viewing directions |
| Product configuration | Material, finish, colour, blade dimensions, and arrangement |
| Posts and connections | Post types, mounting arrangement, and required matching components |
| Gates | Type, clear opening, operation, and hardware scope |
| Supply and documentation | Quantities, packing, spares, drawings, and installation information |
Use YESON’s metal blade fence panels and matching gate options to discuss the required appearance and configuration. Confirm project-specific dimensions and inclusions in writing before placing the order.
FAQ
Can a Metal Fence Provide Both Privacy and Security?
Yes, when its design addresses both requirements. The structure and gate arrangement provide physical separation, while the blade or infill configuration controls views. Evaluate both rather than judging privacy from fence height alone.
Can I Install a Blade Privacy Fence Myself?
A suitable assembly system may be practical for an experienced DIY installer. Check the tools, handling weight, foundation work, and instructions first. Obtain appropriate assistance where the site conditions or structural work exceed your experience.
What Materials Are Needed to Build a Privacy Fence?
For a metal system, the main items are panels or infill components, posts, matching connections, fasteners, finishing pieces, foundations, and any gates. The selected model’s bill of materials determines the actual list.
How Do You Build a 6-Foot Privacy Fence?
Specify the required finished height, then select the panel, bottom clearance, posts, and mounting arrangement to achieve it. Six feet is 1.8288 metres. Check applicable local height requirements and do not assume that post length equals fence height.
How Far Apart Should Privacy Fence Posts Be?
Use the installation module for the chosen system and project conditions. Panel width alone is insufficient because connections and post dimensions affect spacing. Gate openings, corners, and short sections need separate checks.
Can Privacy Fence Panels Be Cut to Size?
Only where the system permits it and the remaining components and connections remain suitable. Some projects need purpose-made sections. Confirm the allowed method and finish repair before cutting or drilling.
Can You Install a Privacy Fence on a Slope?
Yes, with an arrangement suited to the product and terrain. Possible solutions include stepped panels or custom sections. Do not assume a welded blade panel can rack to follow the ground.
Is It Cheaper to Build Your Own Privacy Fence?
It can be, but compare the complete cost. Include tools, foundations, delivery, handling, time, and potential rework. A prepared parts list and a suitable system are essential to a meaningful comparison.
Plan Your Privacy Fence Project with YESON
A successful privacy fence starts with the required screening level, a measured layout, and compatible components. Confirm the blade configuration, dimensions, posts, connections, and gates before production, then install the system using its specified details.
Ready to discuss your project? Request a privacy fence quotation from YESON with your destination, layout, fence height, privacy needs, gate openings, and quantities. These details provide a clearer basis for reviewing suitable product options and supply scope.
 EN
 DE
 FR
 ES
 AR
 PT