Introduction
When building a fence, one of the most crucial—but often overlooked—elements is how deep you dig the fence post holes. Whether you’re installing a wooden privacy fence, a metal perimeter fence, or a vinyl picket fence, the stability of your entire structure hinges on this foundation.
So, how deep should fence post holes be? The answer depends on several factors such as fence height, soil type, climate, and whether you’re using concrete. This guide provides a comprehensive look into post hole depth, offers expert tips, and helps you avoid costly mistakes during installation.
Why Fence Post Depth Matters
Fence post depth isn’t just about sticking a pole into the ground—it directly affects the stability, durability, and safety of your fence. Improper depth can lead to leaning, sagging, and collapse over time, especially in areas with frost heave or high winds.
The General Rule: One-Third Below Ground
As a rule of thumb, you should bury one-third of the fence post’s total length into the ground. For example:
-
A 6-foot tall fence → post should be buried at least 2 feet
-
An 8-foot fence → 2.5 to 3 feet
-
A 10-foot fence → 3+ feet, possibly with reinforcement
This ratio ensures enough anchoring to resist lateral forces like wind and soil shifting.
Factors That Influence Post Hole Depth
Several external conditions can modify the depth required for fence post holes. Ignoring these can result in poor structural integrity.
1. Fence Height
Taller fences catch more wind and require deeper footing. For decorative 3-ft fences, 18–24 inches may suffice. For 6–8 ft privacy fences, go at least 2–3 ft deep.
2. Soil Type
-
Clay soil holds moisture—needs gravel for drainage
-
Sandy soil may require deeper posts or wider holes
-
Rocky soil requires patience and possibly power tools
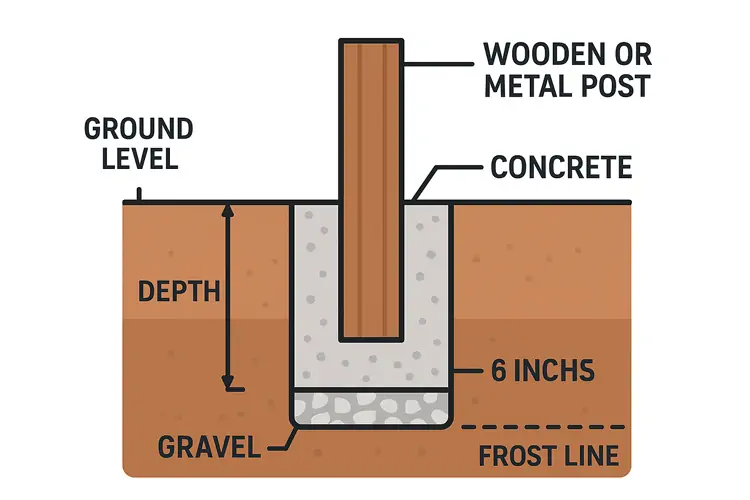
3. Climate & Frost Line
In colder regions, posts should be buried below the frost line to prevent heaving during freeze–thaw cycles.
4. Wind Exposure
In high-wind zones, deeper holes and possibly concrete setting are essential.
5. Water Drainage
Without proper gravel at the base, water can collect around the post, causing wood rot or loosening the base.
6. Local Building Codes
Always check municipal codes, especially for shared or property-line fences. Some codes dictate minimum depth and setting material.
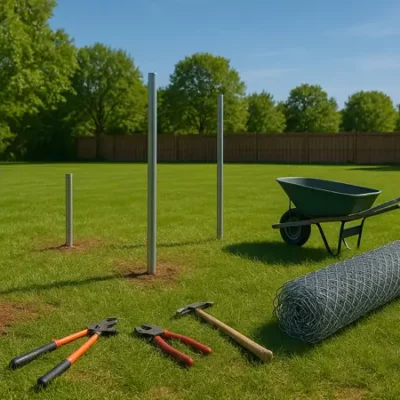
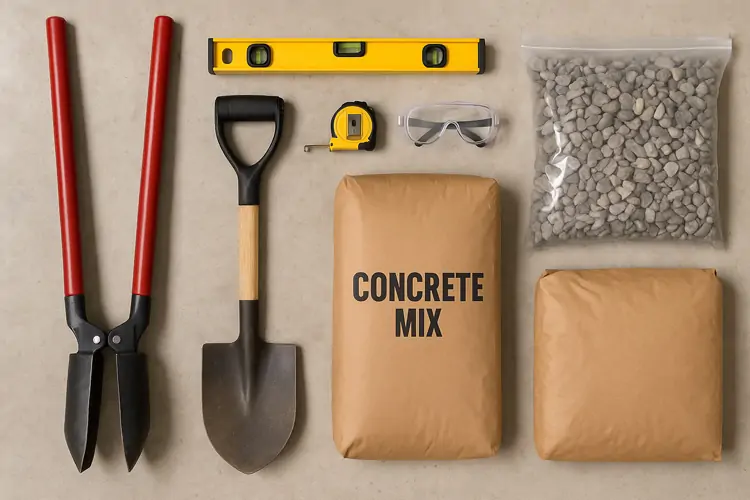
Tools and Materials You’ll Need
Prepare the right tools before digging:
-
Manual or powered post hole digger
-
Shovel and steel bar (for rocky soil)
-
Measuring tape
-
Level (spirit or laser)
-
Gravel (3–6 inches)
-
Concrete mix
-
Safety gloves, boots, and goggles
Post Hole Width Guidelines
The hole diameter should be 3× the width of the post:
-
4″ post → 12″ diameter hole
-
6″ post → 18″ hole
-
Wider holes for gate posts or heavy-duty fences
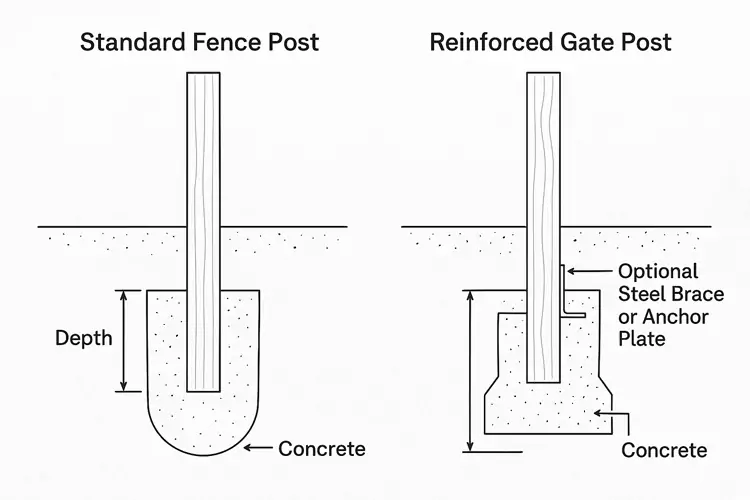
Bell-shaped holes (wider at the bottom) offer better resistance in frost-prone areas, while straight cylindrical holes are easier and faster to dig.
Gate Post Considerations
Gate posts carry extra load due to swinging and often need:
-
Deeper holes (36–48 inches)
-
Wider holes for concrete reinforcement
-
Diagonal bracing or metal sleeves to prevent sagging
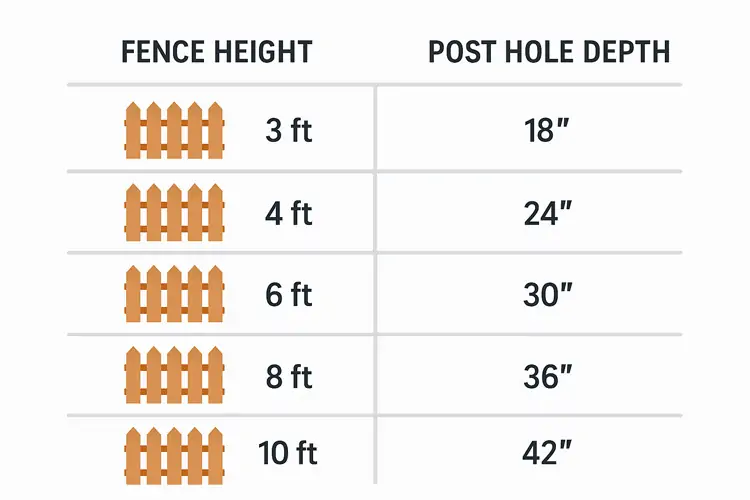
Depth Requirements by Fence Height
Here’s a quick reference table for common fence sizes:
| Fence Height | Recommended Post Hole Depth |
|---|---|
| 3 ft | 18 inches (min) |
| 4 ft | 20–24 inches |
| 6 ft | 24–30 inches |
| 8 ft | 30–36 inches |
| 10 ft | 36–48 inches (with support) |
Step-by-Step: How to Dig and Set Fence Posts
1. Mark the Layout
Use stakes and string to define the fence line. Measure the post intervals (usually 6–8 ft apart).
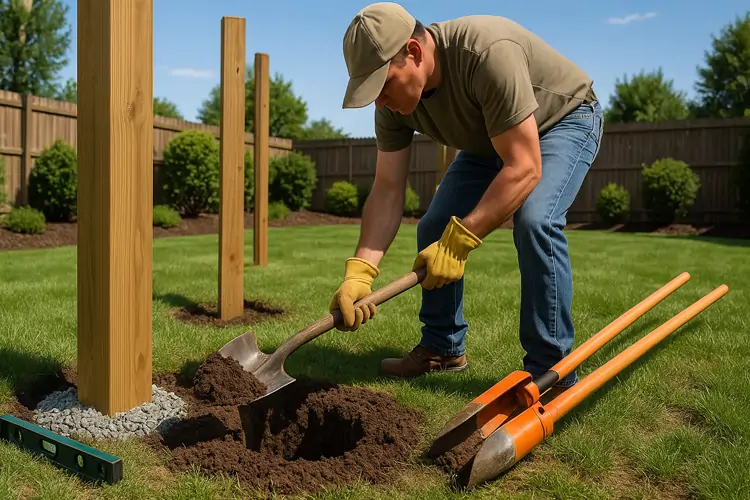
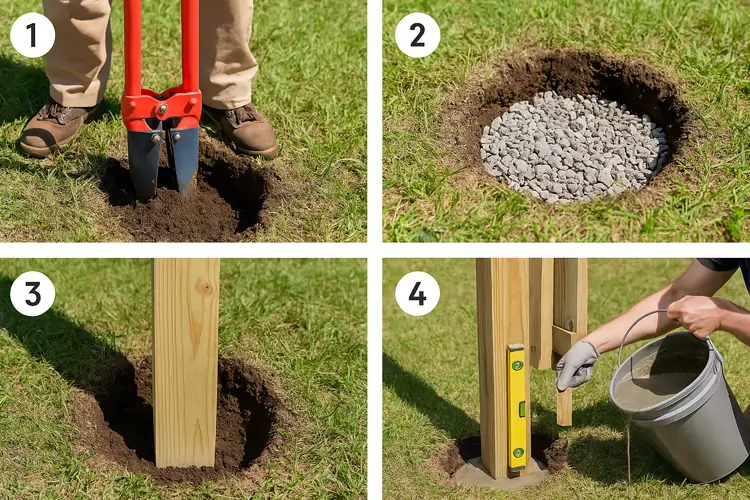
2. Dig the Holes
Use a post hole digger or auger. Keep the sides vertical. Dig to required depth plus extra 6 inches for gravel.
3. Add Gravel Base
Pour 6 inches of coarse gravel at the bottom for drainage.
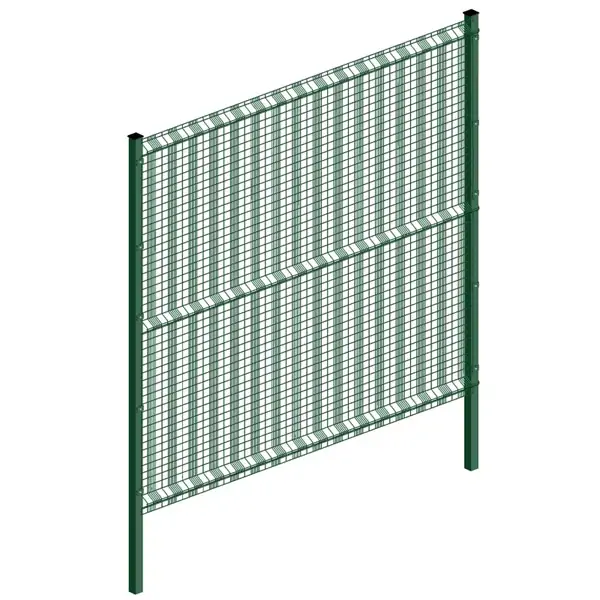
4. Insert and Level the Post
Place the post, use a level, and brace it.
5. Pour Concrete (If Applicable)
Mix quick-set concrete and fill around the post. Slope the top of the concrete to divert water.
6. Let It Cure
Allow concrete to set at least 24–48 hours before attaching panels.
Gravel vs. Concrete: Which is Better?
| Method | Pros | Cons |
|---|---|---|
| Gravel Only | Good drainage, easier removal | May lack strength in soft soil or tall fences |
| Concrete Set | Strong, stable, long-lasting | Can trap moisture (use gravel base) |
Best practice: gravel base + concrete fill for balance between drainage and strength.
Common Mistakes to Avoid
-
Digging too shallow
-
No gravel layer, leading to water damage
-
Using incorrect concrete ratio
-
Misaligned or uneven post spacing
-
Ignoring frost depth in cold climates
-
Rushing the cure time
FAQs
Q1: Can I reuse old fence post holes?
Yes, if they’re properly aligned and stable—but widen them slightly to reset new posts.
Q2: How long should I let concrete cure?
Minimum 24 hours for quick-set concrete; ideally 48 hours in humid climates.
Q3: Do all posts need concrete?
Not necessarily. In well-draining soil, short fences may do well with gravel-only support.
Q4: What if I dig deeper than required?
Backfill with gravel or dirt, tamping firmly. Do not leave loose space below the post.
Still Not Sure How Deep to Dig? Contact YESON for Advice
If you’re still unsure how deep to dig your fence post holes for your specific project, don’t guess—contact YESON. Our fencing experts will help you choose the right depth and materials for your local conditions and fence type.
Conclusion
Digging the right depth for your fence post holes is a foundational step that affects everything from stability to lifespan. By following the 1/3-depth rule, accounting for soil and climate conditions, and using the right tools, your fence will stay strong for years to come.
Whether you’re a homeowner or a contractor, measure twice, dig once—and let YESON support your next fencing project with expert advice and high-quality materials.