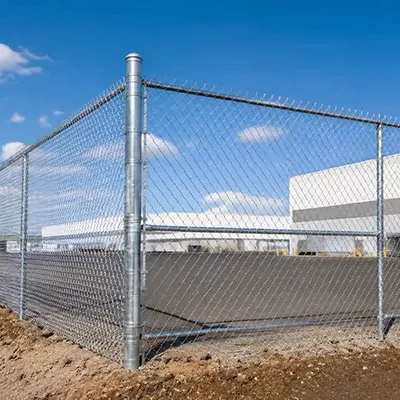
Chain link fencing is one of the most cost-effective, durable, and versatile fencing solutions available today. Whether you’re securing a residential backyard, protecting a commercial property, enclosing a farm, or defining a construction site boundary, chain link fences offer excellent value with relatively simple installation.
For contractors, property owners, distributors, and DIY enthusiasts, understanding the correct installation process can save time, reduce costs, and ensure long-term fence performance.
In this complete guide, you’ll learn how to install a chain link fence step by step, including planning, post spacing, setting posts, attaching mesh fabric, installing gates, and avoiding common installation mistakes.
¿Qué es una valla de alambre de cadena?
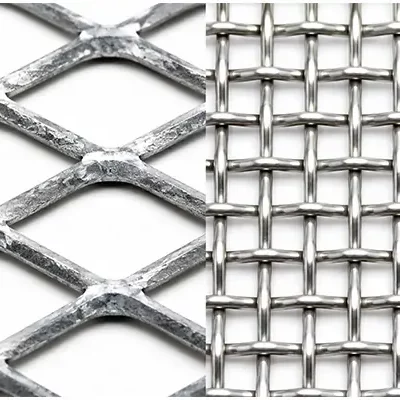
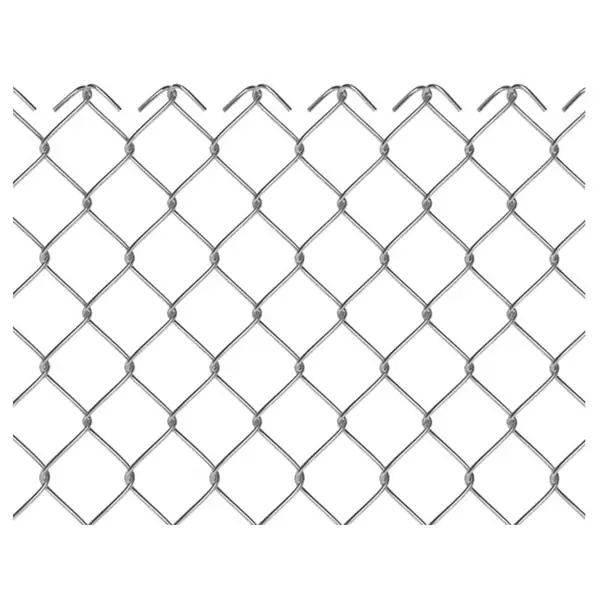
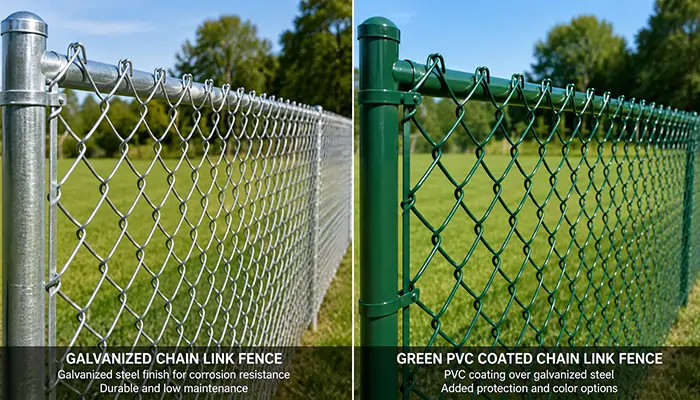
A chain link fence, sometimes called a cyclone fence or wire mesh fence, is a woven steel fencing system made from galvanized or PVC-coated steel wire formed into a diamond-shaped mesh pattern.
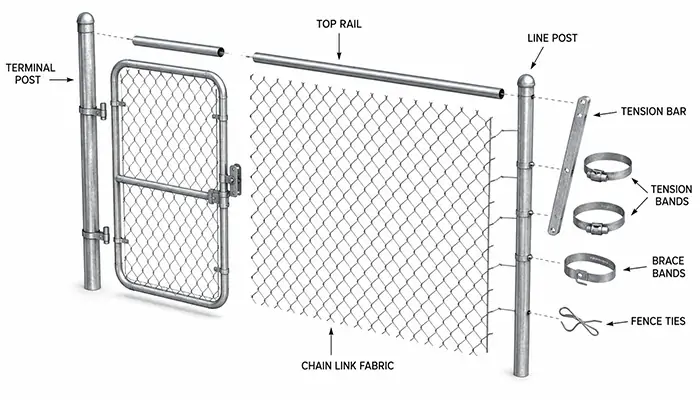
A typical chain link fence consists of:
- Chain link fabric (mesh)
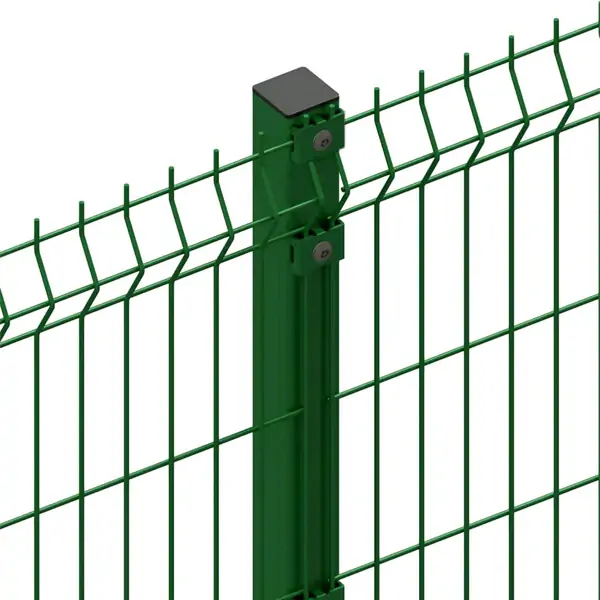
- Terminal posts
- Line posts
- Top rails
- Tension bars
- Tension bands
- Brace bands
- Fence ties
- Tension wire
- Gates and gate hardware
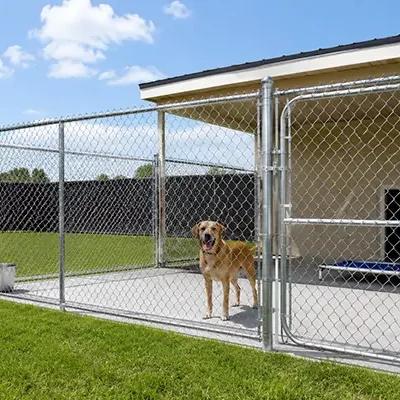
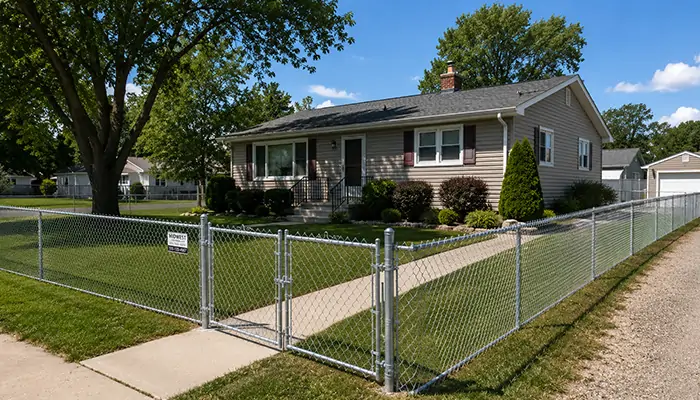
Because of its strength, visibility, and affordability, chain link fencing is widely used for:
- Residential properties
- Commercial facilities
- Almacenes
- Schools
- Parks
- campos deportivos
- Farms and livestock areas
- Industrial security perimeters
Benefits of Installing a Chain Link Fence
Before starting your project, it’s important to understand why chain link fencing remains one of the most popular fencing options worldwide.
Rentable
Compared with wood, aluminum, or wrought iron fencing, chain link fences offer excellent security at a lower cost.
Instalación rápida
Most installations can be completed significantly faster than other fence types.
Bajo mantenimiento
Galvanized and PVC-coated fences resist corrosion and require minimal upkeep.
Larga vida útil
A properly installed galvanized chain link fence can last 20–30 years or longer.
Excellent Visibility
The open mesh design allows visibility while maintaining security.
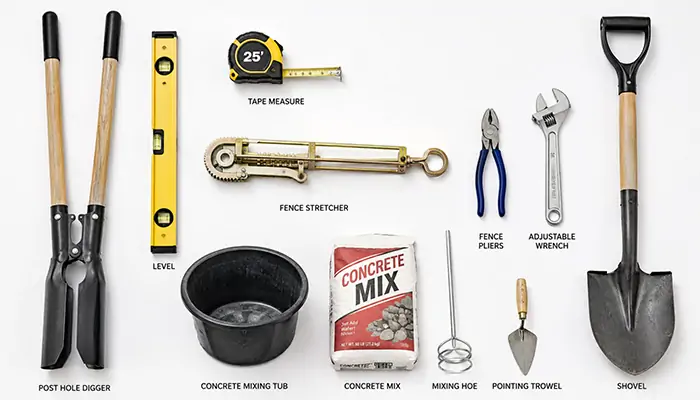
Tools and Materials Needed
Gathering all tools and materials before starting will make installation smoother and more efficient.
Herramientas esenciales
- Cinta métrica
- String line
- Post hole digger
- Shovel
- Carretilla
- Nivel
- Fence puller or stretcher
- Pipe wrench
- Pliers
- Socket wrench set
- Concrete mixing tools
- Safety gloves
- Safety glasses
Required Materials
- Chain link fence fabric
- Terminal posts
- Line posts
- Top rails
- Tension bars
- Tension bands
- Brace bands
- Fence ties
- Tension wire
- Post caps
- Gate hardware
- Mezcla de hormigón
Planning Your Chain Link Fence Layout
Proper planning is the foundation of a successful fence installation.
Determine Property Boundaries
Verify property lines before digging. Installing a fence beyond your property line can lead to costly disputes.
Consulte las regulaciones locales
Many municipalities have requirements regarding:
- Altura de la valla
- Setback distances
- Gate placement
- Building permits
Always verify local regulations before beginning work.
Locate Underground Utilities
Contact local utility locating services before digging post holes.
Underground utilities may include:
- Electrical lines
- Water pipes
- Gas lines
- Communication cables
Measure the Fence Line
Mark the fence perimeter using stakes and string lines.
Measure:
- Total fence length
- Corner locations
- Gate openings
- Elevation changes

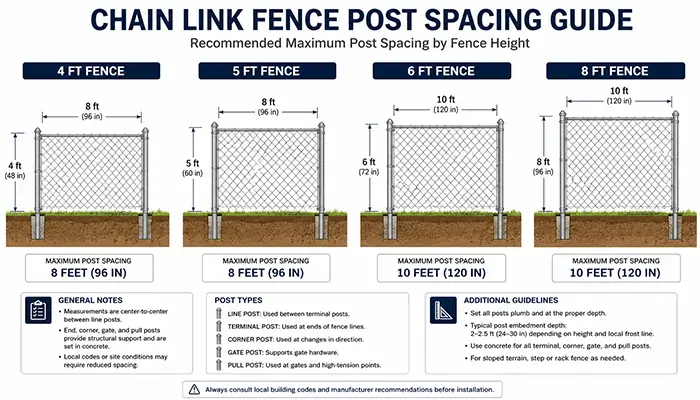
Chain Link Fence Post Spacing Chart
Correct post spacing ensures strength and stability.
| Altura de la valla | Recommended Post Spacing |
|---|---|
| 4 ft (1.2 m) | 8–10 ft |
| 5 ft (1.5 m) | 8–10 ft |
| 6 ft (1.8 m) | 8–10 ft |
| 8 ft (2.4 m) | 10–12 ft |
Types of Fence Posts
Terminal Posts
Installed at:
- Corners
- Ends
- Gates
- Direction changes
These posts carry most of the fence tension.
Postes de línea
Installed between terminal posts to support the fence fabric.
Paso 1: Marcar y cavar agujeros para los postes
After determining post locations, begin digging.
Recommended Hole Depth
A common guideline is:
Post depth = approximately one-third of fence height
Ejemplos:
| Altura de la valla | Hole Depth |
|---|---|
| 4 pies | 24 in |
| 6 pies | 30–36 in |
| 8 pies | 36–42 in |
Hole Diameter
Typically:
- 6–8 inches for line posts
- 8–12 inches for terminal posts
Larger holes provide greater stability.
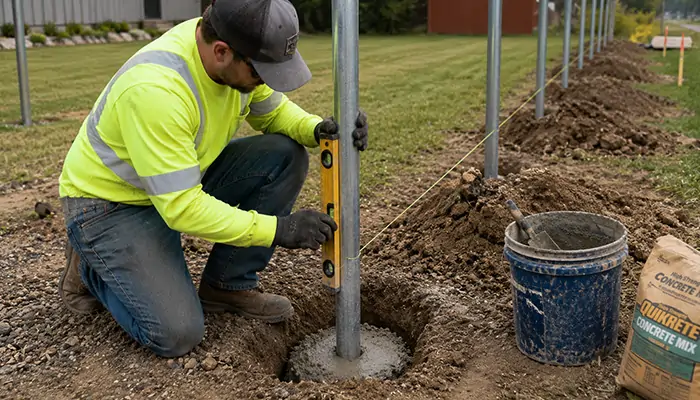
Step 2: Set Terminal Posts
Terminal posts should always be installed first.
These include:
- Corner posts
- End posts
- Gate posts
Installation Procedure
- Place the post in the hole.
- Verify plumb using a level.
- Pour concrete around the post.
- Recheck alignment.
- Allow concrete to cure for at least 24–48 hours.
Terminal posts must be perfectly aligned because they support the tension of the fence fabric.
Paso 3: Instalar los postes de línea
Once terminal posts are secure, install line posts.
Procedure
- Stretch a string line between terminal posts.
- Position line posts at planned spacing.
- Ensure all posts are vertically level.
- Pour concrete.
- Allow proper curing.
Proper alignment produces a professional-looking fence line.
Step 4: Install Top Rails and Brace Assemblies
After posts have cured, install the framework.
Install Post Caps
Post caps secure the top rail and protect posts from moisture.
Install Top Rails
Top rails connect line posts and improve fence rigidity.
Top Rail Installation Tips
- Keep rail sections aligned.
- Use rail sleeves where necessary.
- Secure all connections firmly.
Install Brace Rails
Brace rails are commonly installed near corners, ends, and gates for additional support.
Step 5: Install the Chain Link Fabric
This is the most important stage of installation.
Unroll the Fence Fabric
Lay the chain link mesh along the fence line.
Avoid twisting or kinking the fabric.
Insert the Tension Bar
Slide a tension bar vertically through the first row of chain link diamonds.
Attach Tension Bands
Secure the tension bar to the terminal post using tension bands.
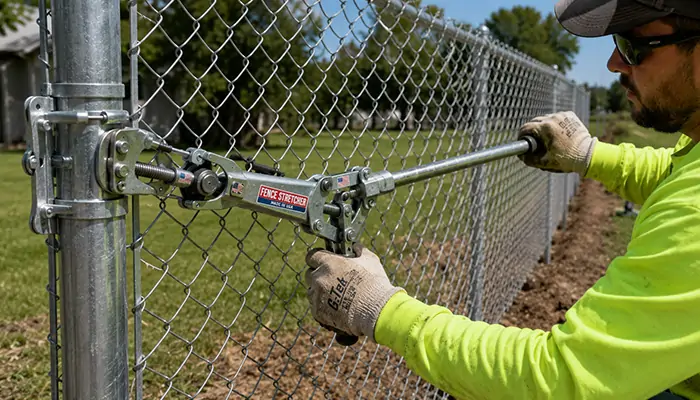
Stretch the Fabric
Use a fence stretcher to pull the fabric tightly.
Proper tension is critical.
Too loose:
- Fence sags
- Reduced appearance
- Lower durability
Too tight:
- Excessive stress on posts
- Potential hardware failure
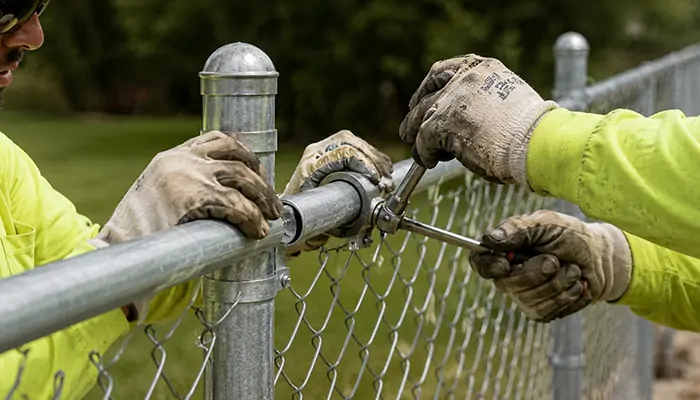
Attach to Top Rail and Line Posts
Secure mesh using fence ties at recommended intervals.
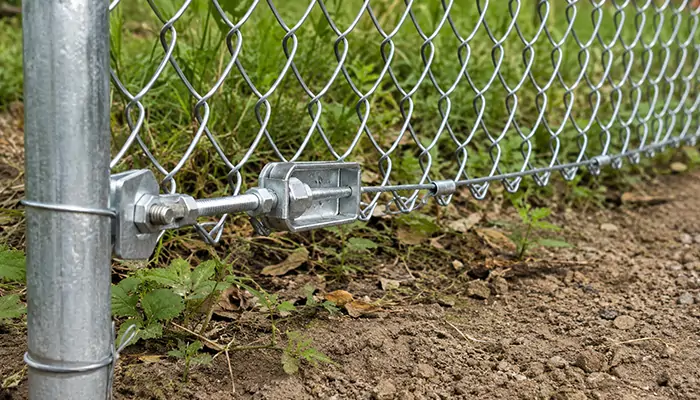
Step 6: Install Tension Wire
Tension wire strengthens the bottom portion of the fence and prevents lifting.
Why Use Tension Wire?
Benefits include:
- Improved stability
- Reduced sagging
- Better animal control
- Increased security
Installation Process
- Attach wire to terminal posts.
- Run wire along the entire fence line.
- Tighten using wire strainers.
- Secure chain link fabric to the wire.
This step is highly recommended for residential, agricultural, and commercial fences.
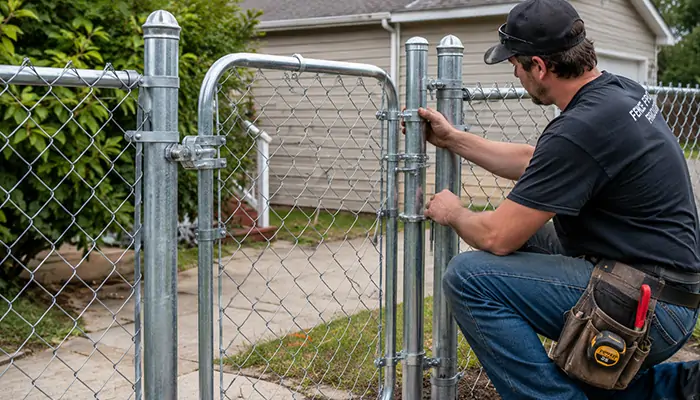
Step 7: Install a Chain Link Fence Gate
A properly installed gate ensures smooth operation and security.
Install Gate Posts
Gate posts must be stronger than standard line posts.
Use:
- Larger diameter posts
- Deeper concrete foundations
Attach Hinges
Secure hinges to gate posts according to manufacturer specifications.
Hang the Gate
Check:
- Swing clearance
- Ground clearance
- Alignment
Install Latch System
Ensure the latch engages smoothly and securely.
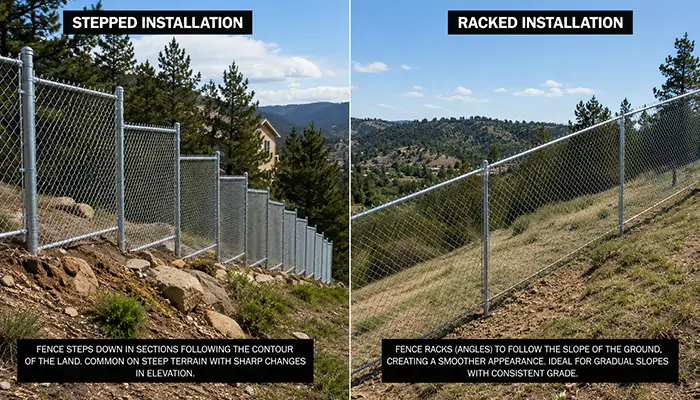
How to Install a Chain Link Fence on a Slope
Sloped terrain requires special installation methods.
Method 1: Stepped Fence Installation
Each fence section remains level while stepping down the slope.
Ventajas:
- Easier installation
- Cleaner appearance
Disadvantages:
- Gaps may appear beneath the fence
Method 2: Racked Fence Installation
The mesh follows the slope continuously.
Ventajas:
- Better ground coverage
- Reduced gaps
Disadvantages:
- More installation effort
For moderate slopes, racked installations are often preferred.
How to Attach Chain Link Fence to Wood Posts
Some property owners prefer combining wood posts with chain link mesh.
Required Hardware
- Wood post brackets
- Lag screws
- Tension bands
- Tension bars
Installation Process
- Install wood posts.
- Attach mounting brackets.
- Secure tension bars.
- Stretch chain link fabric.
- Fasten mesh to brackets.
This combination provides a more decorative appearance while maintaining durability.
Common Chain Link Fence Installation Mistakes
Avoid these common errors:
Incorrect Post Spacing
Wide spacing reduces fence strength.
Shallow Post Holes
Posts may lean or fail over time.
Insufficient Concrete Curing
Premature loading can weaken foundations.
Loose Fence Fabric
Results in sagging and poor appearance.
Poor Gate Alignment
Causes binding and difficult operation.
Ignoring Tension Wire
Reduces fence stability and security.
DIY Chain Link Fence Installation Cost
Costs vary depending on:
- Altura de la valla
- Calibre del cable
- Galvanized or PVC-coated finish
- Terrain conditions
- Gate quantity
- Labor requirements
Typical cost factors include:
- Publicaciones
- Mesh fabric
- Hardware
- Concreto
- Gates
- Herramientas
DIY installation can significantly reduce overall project costs compared to hiring contractors.
Chain Link Fence Maintenance Tips
A properly maintained chain link fence can provide decades of service.
Inspect Annually
Check for:
- Loose ties
- Damaged mesh
- Rust spots
- Loose gate hardware
Clean Periodically
Wash dirt and debris with water.
Repair Damage Promptly
Replace bent mesh or damaged fittings before problems spread.
Protect Against Corrosion
Touch up scratches on galvanized or coated surfaces when necessary.
Preguntas frecuentes
How far apart should chain link fence posts be?
Most installations use spacing between 8 and 10 feet.
How deep should chain link fence posts be?
Typically one-third of the fence height, depending on soil conditions.
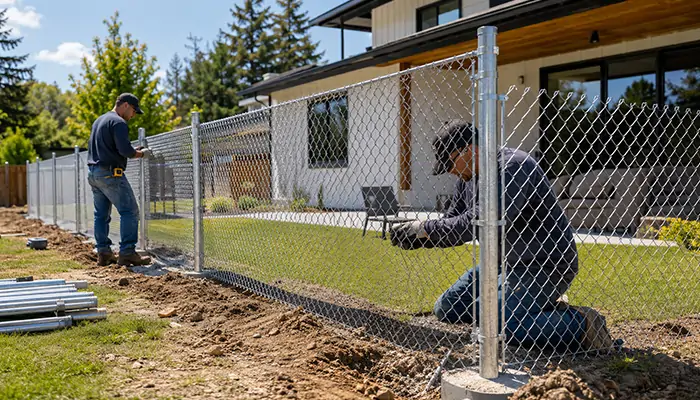
Can one person install a chain link fence?
Small projects are possible, but two people make installation easier and safer.
Do I need tension wire?
For most installations, tension wire is highly recommended for strength and durability.
How long does installation take?
A typical residential fence can often be installed within one to three days, depending on project size and site conditions.
Conclusión
Installing a chain link fence is a practical project that can provide long-lasting security, boundary definition, and property protection. By carefully planning the layout, setting posts correctly, maintaining proper post spacing, stretching the mesh properly, and installing tension wire and gates correctly, you can achieve professional-quality results.
Whether you are a homeowner tackling a DIY project, a contractor managing a commercial installation, or a distributor supplying fencing materials, understanding the fundamentals of chain link fence installation helps ensure a stronger, safer, and more durable fence system.